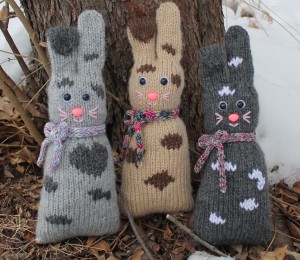
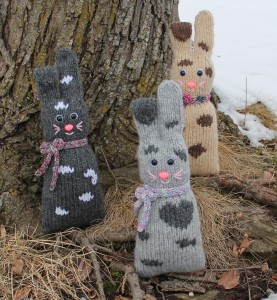
I promised you a free pattern and here it is! It’s not exactly what I thought it would be when I started out, but sometimes designs have a mind of their own. I hope you like what my original sketch transformed into. Enjoy!
Little Bunny Cushion
Materials:
63y bulky yarn in MC (samples were knit using Lion Brand Jiffy)
10y bulky yarn in CC
12y bulky yarn in white
5y fingering weight yarn (optional)
Scraps of pink worsted weight yarn
Set of 5 5mm US 8 double pointed needles
10 mm safety eyes and nose
Stuffing
White felt
Yarn needle
Stitch marker
Stitch holder
Tape measure
Scissors
Pom pom maker
(Tip-If you don’t have bulky yarn, try using two strands of worsted weight yarn held together. This project is a great stash buster.)
Gauge:
16 sts & 22 rows = 4″ in Stockinette Stitch
Measurements:
Approximately 12 1/2” tall and 4 1/2” wide.
Terms and Abbreviations:
K = knit
sts = stitch(es)
rnd(s) = round(s)
CO = cast on
[ ]= repeat instructions between [ ]’s as many times as noted after
M1L = Make a left-leaning sts by bringing the tip of the left-hand needle under the strand between stitches, from front to back. Knit through the back of the loop
M1R = Make a right-leaning sts by bringing the tip of the left-hand needle under the strand between stitches, from back to front. Knit this loop
k2tog = knit two sts together
ssk = slip, slip, k these 2 sts together
DPN’s = double pointed needles
MC= main color
CC = contrasting color
Pattern:
With MC and 5mm DPN’s CO 40 sts, leaving a long tail. Distribute the sts onto 3 needles so that there are 20 sts on needle 1 and 10 sts on needles 2 & 3. Join, being careful not to twist the sts.
Knit until the piece measures 6”.
Next Rnd: [K2tog] to end. (20 sts)
Next Rnd: Knit.
Rnd 1:
Needle 1: K1, M1R, K to last sts, M1L, K1.
Needle 2: K1, M1R, K to end.
Needle 3: K to last sts, M1L, K1.
Rnd 2: Knit.
Repeat Rnds 1 & 2 until there are 32 sts on the needles, ending with rnd 2.
Knit 10 rounds.
Rnd 1:
Needle 1: K1, SSK, K to last 3 sts, K2tog, K1.
Needle 2: K1, SSK, K to end.
Needle 3: K to last 3 sts, K2tog, K1.
Rnd 2: Knit.
Repeat Rnds 1 & 2 until there are 24 sts on the needles, ending with rnd 2.
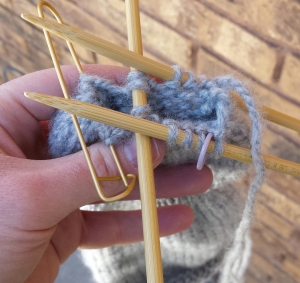
You are now going to work in the round on the first 6 sts on needle 1 and the 6 sts on needle 3. Place the remaining sts on a holder.
Knit for 3”.
[K2tog] to end. (6 sts)
Cut yarn and thread through the remaining stitches. Poke the yarn tail inside the ear and weave it in.
Distribute the remaining sts onto 3 DPN’s. Join the yarn at the gap between the ears leaving a long tail.
Knit for 2”.
Break off MC and Join CC.
Knit for 1”.
[K2tog] to end. (6 sts)
Cut yarn and thread through the remaining sts. Bend the tip of the ear down at the color change and use the yarn tail to secure it in place. Weave in the remainder of the yarn tail on the inside of the ear.
Use the tail you left when joining the yarn for the second ear to made a few stitches to close the gap between the ears.
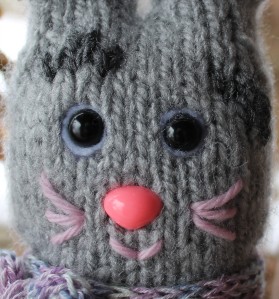
Cut two circles out of white felt a little larger than the safety eyes that you are using. Poke the eyes through the middle of the felt circles and attach them to the head. Attach the safety nose and embroider on whiskers and a mouth using scraps of pink yarn. Using white yarn, make a large pom pom and secure it to the back of the bunny. With CC make some random duplicate stitch spots all over the bunny’s body. Add as many or as few as you would like.
When everything is secured, attached, and woven in, stuff the bunny’s head and body (I left the ears unstuffed) and seam the bottom of the cushion closed using mattress stitch and the tail from the CO.
To make the bow around the neck I used some scraps of fingering weight yarn and my Embellish Knit machine to make an i-cord approximately 26” long. I wrapped it around the neck twice and tied it into a bow. Feel free to explore other options here. You could use ribbon, knit a 4 sts i-cord if you don’t have the machine, or knit a small scarf. The options are endless.
And you are finished!
Little Bunny Cushion Created by Whitney Webster © Whitney Webster March 2015 All Rights Reserved.
Copyright information:
This pattern is for your own personal use. This pattern may not be sold, reprinted or distributed without prior authorization. You may however sell finished objects made from this pattern on a small scale. All I ask is that you give me credit as the designer and link back to my site. You must use your own photos of items.


Couldn’t be more cute it it tried! Just love it!!!